Importing reagent and control lot numbers and kit information
A new stand-alone tool is provided in the EE root directory called ReagentLoader.exe that can import .csv files containing lot number, kit, reagent, control, and calibrator information into EP Evaluator. The source files can have any name chosen by the user because the tool will identify what sort of data is being imported from the column headers in the .csv file. Run the tool from the root directory, select the project to import data to, then select File>Open source file and navigate to the .csv file where the data is located.
NOTE: Two examples of csv files that could be used as a template are included in the root direction for EE. These are named Example Reagent Import.csv and Example Kit Import.csv.
The parameters form within most statistical module experiment details screens provides an opportunity to enter lot numbers. When the down arrow next to control, reagent, or calibrators is pressed the user is presented with the list of controls entered or imported. The information in this table can be populated from the .csv file containing this information, once the file has been imported.
The .csv file can be updated by the user on a regular basis, and using the tool the control lot information in EE can then be easily updated by opening the Parameters tab and selecting the up-to-date lot information.
NOTE: If running on Windows Server versions then be sure to right click to run ReagentLoader.exe as administrator.
In the .csv file, headers for reagent, control, or calibrator information imports should be as follows:
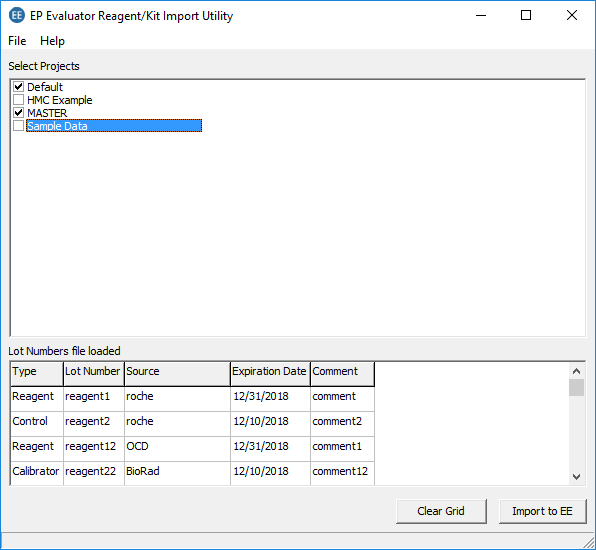
Type, Lot Number, Source, Expiration Date, Comment
Kits
In the .csv file, headers for Kit import columns should be as follows:
Instrument Class, Analyte, Type, Specimens
'Type' refers to the type of statistical module being supplied with the data. These can be suffixed with the terms shown below depending on what type of values or levels are being defined.
Kits can only be imported for the following modules:
Linearity/EP6 Linearity
Simple Accuracy
LOQ
When importing to Linearity or EP6 Linearity modules users should also specify what type of kit is being imported in the Type column. These can be suffixed with the terms shown below depending on what type of values (value mode) or levels are being defined. In the examples directly below the Kit will only be available for Linearity and/or EP6 Linearity statistical modules.
Linearity/EP6 Linearity - Pre-Assigned
Linearity/EP6 Linearity - Coded
Linearity/EP6 Linearity - % Measured
Linearity/EP6 Linearity - % Assigned
Linearity/EP6 Linearity - % Split
Linearity/EP6 Linearity - Delta 1/5
Linearity/EP6 Linearity - Delta 2/3
Linearity/EP6 Linearity - Delta 3/4
Linearity/EP6 Linearity - Delta 1/3
Linearity/EP6 Linearity - Delta 2/4
Linearity/EP6 Linearity - Alternate Coded
Once the Kit data has been imported, go to the Parameters form of the relevant module, then click the Edit button under the Specimens and Assigned values area of the screen. This will open a form where value mode can be changed, and data can be edited. Click on the table to open a selection table where the imported kit names and values can be seen and selected.
Values for the Kit levels in the Specimens column should be separated using a | pipe character.
For Simple Accuracy experiments, Tgt low and Tgt high can be defined. If only one value is imported for Tgt Low and Tgt High, then it will populate both columns with the same Tgt. With a Tgt Low and a Tgt High specified the specimen cell could have the following data entered: CalKitImport-1,1.0, 1.1|CalKitImport-2,4.0, 4.1|CalKitImport-3,7.0, 7.2
Two examples of csv files that could be used are included in the root direction for EE. These are named Example Reagent Import.csv and Example Kit Import.csv.